TRANSLATE

Sunday, March 13, 2016

Vintage French Laundry Basket in 12th scale - Part 1


It has taken me a little longer than anticipated to do up a tutorial. This is going to be part one as I have been going to visit my hubby in hospital. Anyway, I will get the rest done as soon as possible.


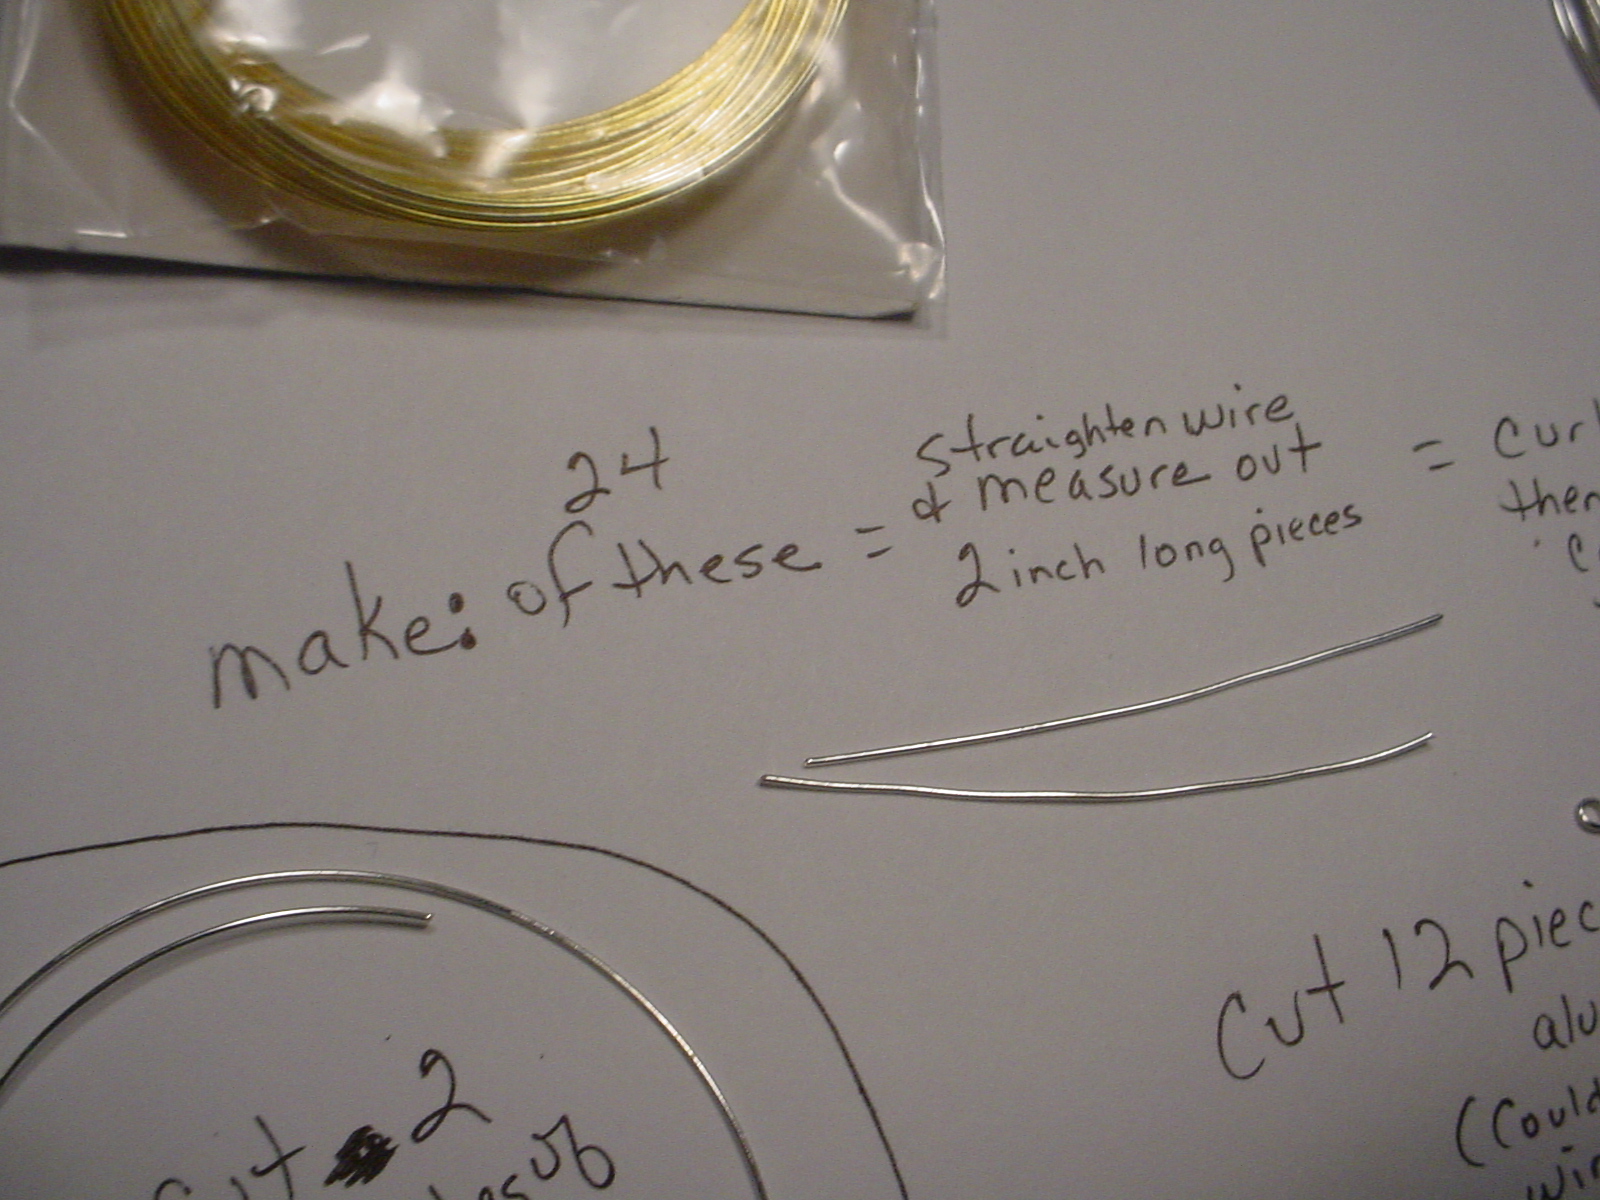
Use memory wire...this is usually used for those coiled bracelets and is the fine gauge.


Straighten the wires as best you can and curl each end as shown in next picture


Part of the info was cut off; sorry...
It reads:

Cut 12 pieces of tin can or very heavy aluminum for the clips or connectors. It has to be strong enough to hold the wire pieces without stretching the connectors back out. You can also use tiny spring like coils made from the memory wire to thread the "v" through but you can't curl the ends until you have both "v"s through the hole.

The connectors measure 3/16 inch wide by 1/4 inch long.....

The next picture continues the info:


See the next picture for a view of the connectors.


Just as soon as I can, I will show you how to thread the "V" pieces onto the circles and how to finish it off.
 
Please bear with me as my time is limited for minis. I do still work a full time job and hubby is in and out of hospital just now until we can see a specialist for his problem.
 
Thank you to all who commented on my latest post and thank you for your prayers and best wishes for us.


Friday, March 11, 2016

Been a while since I have posted, I know.....
It has been a difficult year for my hubby and myself.
I won't go into details but we are hoping for a solution to his current health issue very soon.
Keep us in your thoughts and prayers!

Hopefully this weekend I will be able to make a picture post and tell you how I made a wire French laundry basket similar to this:


(NOT MY IMAGE)


Take care everyone!

Thursday, November 13, 2014

My world has just become a little smaller.......

I lost one of my dear friends, Judith Howard, to cancer this morning. She was so special!
She lived in the United Kingdom. We have been Pen Pals for over 20 years and had each visited the other "in person". I feel such a dreadful loss. Please pray for her family. She leaves a husband and their three grown children and several grandchildren.
She will be so greatly missed!
gail

Saturday, August 9, 2014

Hello, All.....
I have added some new items to my etsy shop, finally!


If you care to take a look, this is the link:
https://www.etsy.com/shop/GAILofTHELITTLEHOUSE?ref=pr_shop_more

Hope to have another tutorial up before much longer.
Hope everyone is doing well!

Monday, July 14, 2014

Just a quick post to let you know about sealing the Gallery Glass.......

I used clear China Glaze Quick Dry Top Coat for nails, working quickly so as not to create blobs and streaks as it does dry very fast.

It worked okay but I still get a little tendency for the bottles to want to stick together.

If anyone comes up with a better solution, I would like to know.

Have a good week everyone!

Wednesday, July 9, 2014

MADE A FEW MORE......
Had a day off today so I played around a little.
On one I ran the lines around the bottle instead of up and down.
On another I dotted the bottle directly with the Gallery Glass.
I experimented with some alcohol ink in green on another striped bottle.
Alcohol ink gave it a vintage/aged look. My blue alcohol ink may be old or separated because I got a very spotty look with bits of darker "pieces" of color that look like little tiny chunks of something stuck to the inside. For some things we may want this look. Anyway, I will try again this weekend....
 
Just wanted to share with you all.....
Have a good rest-of-the-week!


Friday, July 4, 2014

I WANT TO SHOW YOU SOMETHING.........
You know those little bottles that some medications come in?
Well, I have thrown away a lot of these because I thought they are too big for 12th scale. They are a little shy of 1 1/2 inches tall. Even so, I have decided to do a little experimenting with a few of them and this is what I came up with.
I have seen 12th scale blown glass ribbed style jars/bottles and cannot afford to purchase them.
I used my pliers to carefully remove the metal rim and then trimmed the rubber stopper on the bottom to make it more lid like.
I then removed the labels and used alcohol swabs to clean the adhesive and any remaining label that wouldn't come off.
I ran lots and lots of lines of Gallery Glass clear onto some smooth plastic lids and let dry well. It does take a steady hand but if you squeeze and draw it across fairly quickly from left to right (if you are right handed) then you can get thin lines about 1/16th of an inch or so in width.
LET DRY WELL............
The next day, I peeled up a line and placed it on the bottle starting where the neck and "shoulder" of the top and ran it down the side and ended just under the bottom. Run your finger over it to make sure it is stuck well. The gallery glass does stretch when you are laying it so if your lines are a little wider in spots you can adjust it a little as you place it.  

The last picture shows my first attempt. I placed my lines too far apart and it didn't look right to me. My second and third  attempts are more of what I am looking for. Like I said these are rather large to use in 12th scale but pasta, cracker and cookie storage in the mini pantry does come to mind.
In my previous experiments with gallery glass my projects hardened over time and were not sticky. I still don't like to store items with gallery glass touching each other as it probably would stick them together.
Hope you will experiment with this idea and come up with some of your own ideas....
Have a great week!
 
(It is much more difficult to get the lines straight and an even width if you make them directly onto the bottles)