MINIATURE LOTION BOTTLE TO MAKE
Hope everyone out there is doing good......
Don't forget to "mine" your throw away soap dispensers and spray bottles for different size plastic tubing.
When made into bottles or jars, they look like frosted glass.
When made into bottles or jars, they look like frosted glass.
Start with the size of your choice and cut a piece 1/2 inch or 5/8 inch long depending on the height you want your bottle to be.
The bottle I made is 5/8".
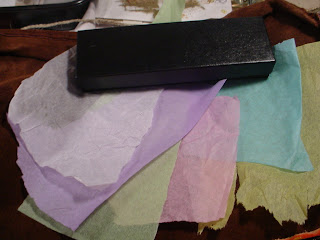
Choose a color of tissue paper:
Cut a piece 5/8 inch (or 1/2 inch) wide by 4 inches long.
Roll the strip around a round toothpick (cocktail stick).
Test the fit into the tubing piece and tear off some of the length if you need to so that it will fit inside the tube
I keep a small container with stiff plastic brush bristles clipped from a cleaning brush.
I use these to glue into the center of the bottle instead of a sewing pin or wire. Plastic bristles will not rust from the moisture in the glue.
Dot a little glue into the center of the tissue roll inside the bottle and insert the plastic bristle then thread one crimp tube onto the plastic bristle. Try not to use too much glue like I did. (select a relative size crimp bead to your bottle size)
Punch a circle from a 4-fold piece of your chosen color of tissue paper (again, the size depends on the inner opening of your bottle) and pierce a hole in the center. The tubing for my bottle here has an inner hole size of 1/8".
Thread this onto your plastic bristle and follow with another crimp bead with a dab of glue in between. Slide each down to the bottle trying to fit the first crimp bead into the center of the tissue paper roll. I used a little too much glue before the first crimp tube went on and could not see the center of my roll. My tissue roll was pushed down a little too far into the bottle.
Let all this dry a little and clip the bristle off to 1/16" above the top of the crimp bead.
I used this punch on thin cardstock to get a teardrop shape. You could also use a leafe shape acrylic fingernail rhinestone.
Glue the teardrop onto the tip of the bristle and let dry well.
Dot some dimensional paper glaze/glue onto the top of the teardrop and let dry.
This may work with clear fingernail polish. I have never tried this but please do experiment with what you have.
Use a gold marker to "paint" the shape and let dry well.
Print out the label at the end of this tutorial (the square should measure 1/2" square in your editing program.) Cut label out and edge with gold marker and glue onto bottle.
Now your mini girls have hand and body lotion.


That's a brilliant lotion bottle! :D
ReplyDeleteThank you so much!
ReplyDeleteWhat a fantastic tutorial! So that's how you made that gorgeous lotion bottle I got from you! Thank you for the lovely tutorial, including the label. Your finished product looks beautiful, Gail! xo Jennifer
ReplyDeleteI love when people see minis in the darnedest things! Awesome idea!
ReplyDeleteYou are so kind to share this tutorial! Thank you!
ReplyDeleteSo clever !!
ReplyDeleteThank you!!!
ReplyDeleteGreat tuto!...Thank you so much..Hugs
ReplyDeleteWonderful tutorial thank you so much for sharing. Your bottle looks fantastic.
ReplyDeleteHugs Maria
Thanks!! A great idea!
ReplyDeleteThank you so much for this tutorial. Your bottle looks great.
ReplyDeleteHugs, Drora
Thanks for this fantastic idea!
ReplyDeleteBye Faby
Great idea, thank you very much for sharing, I'm going to try when my soap is empty!
ReplyDelete* marlies
Genial, fantástico!! Muchas gracias por compartir!!
ReplyDeleteBesitos
Muchas gracias por compartir, te ha quedado genial.
ReplyDeletebesitos ascension
Wonderful. Thanks for your kindness.
ReplyDeleteexcelente tutorial!!! muchas gracias! prometo intentarlo
ReplyDeleteIngenious!!!!!!
ReplyDeleteC'est bien de laisser en permanence votre tutoriel très intéressant.
ReplyDeleteJe viens de le voir aujourd'hui. Merci de nous faire partager vos bonnes idées.
Fab and so pretty8 Thanks a lot.
ReplyDelete